After setting up your Green Screen (Chroma Key) panel, ensuring proper lighting and having a reasonable distance between the Green Screen (Chroma Key) panel and yourself, you can get started!
To get the best results you should adjust the Chroma Key effect. Here are some instructions to help you out.
The following controls can be adjusted. You should always proceed in this order (from general settings to fine-tuning).
Hue
Select the main color that you want to be keyed. This color gets isolated and will be replaced by transparency. You can either use the "Pick Color" tool or the Hue slider to make adjustments.
Tolerance
To improve your result you need to adjust the color range sampled - this means how much the background color can differ from the selected key color.
Reducing the value narrows the range of color sampled, and vice versa, augmenting expands it.
This can be necessary as your background color will probably not be uniform (eg. because of imperfect lightening or camera sensor noise).
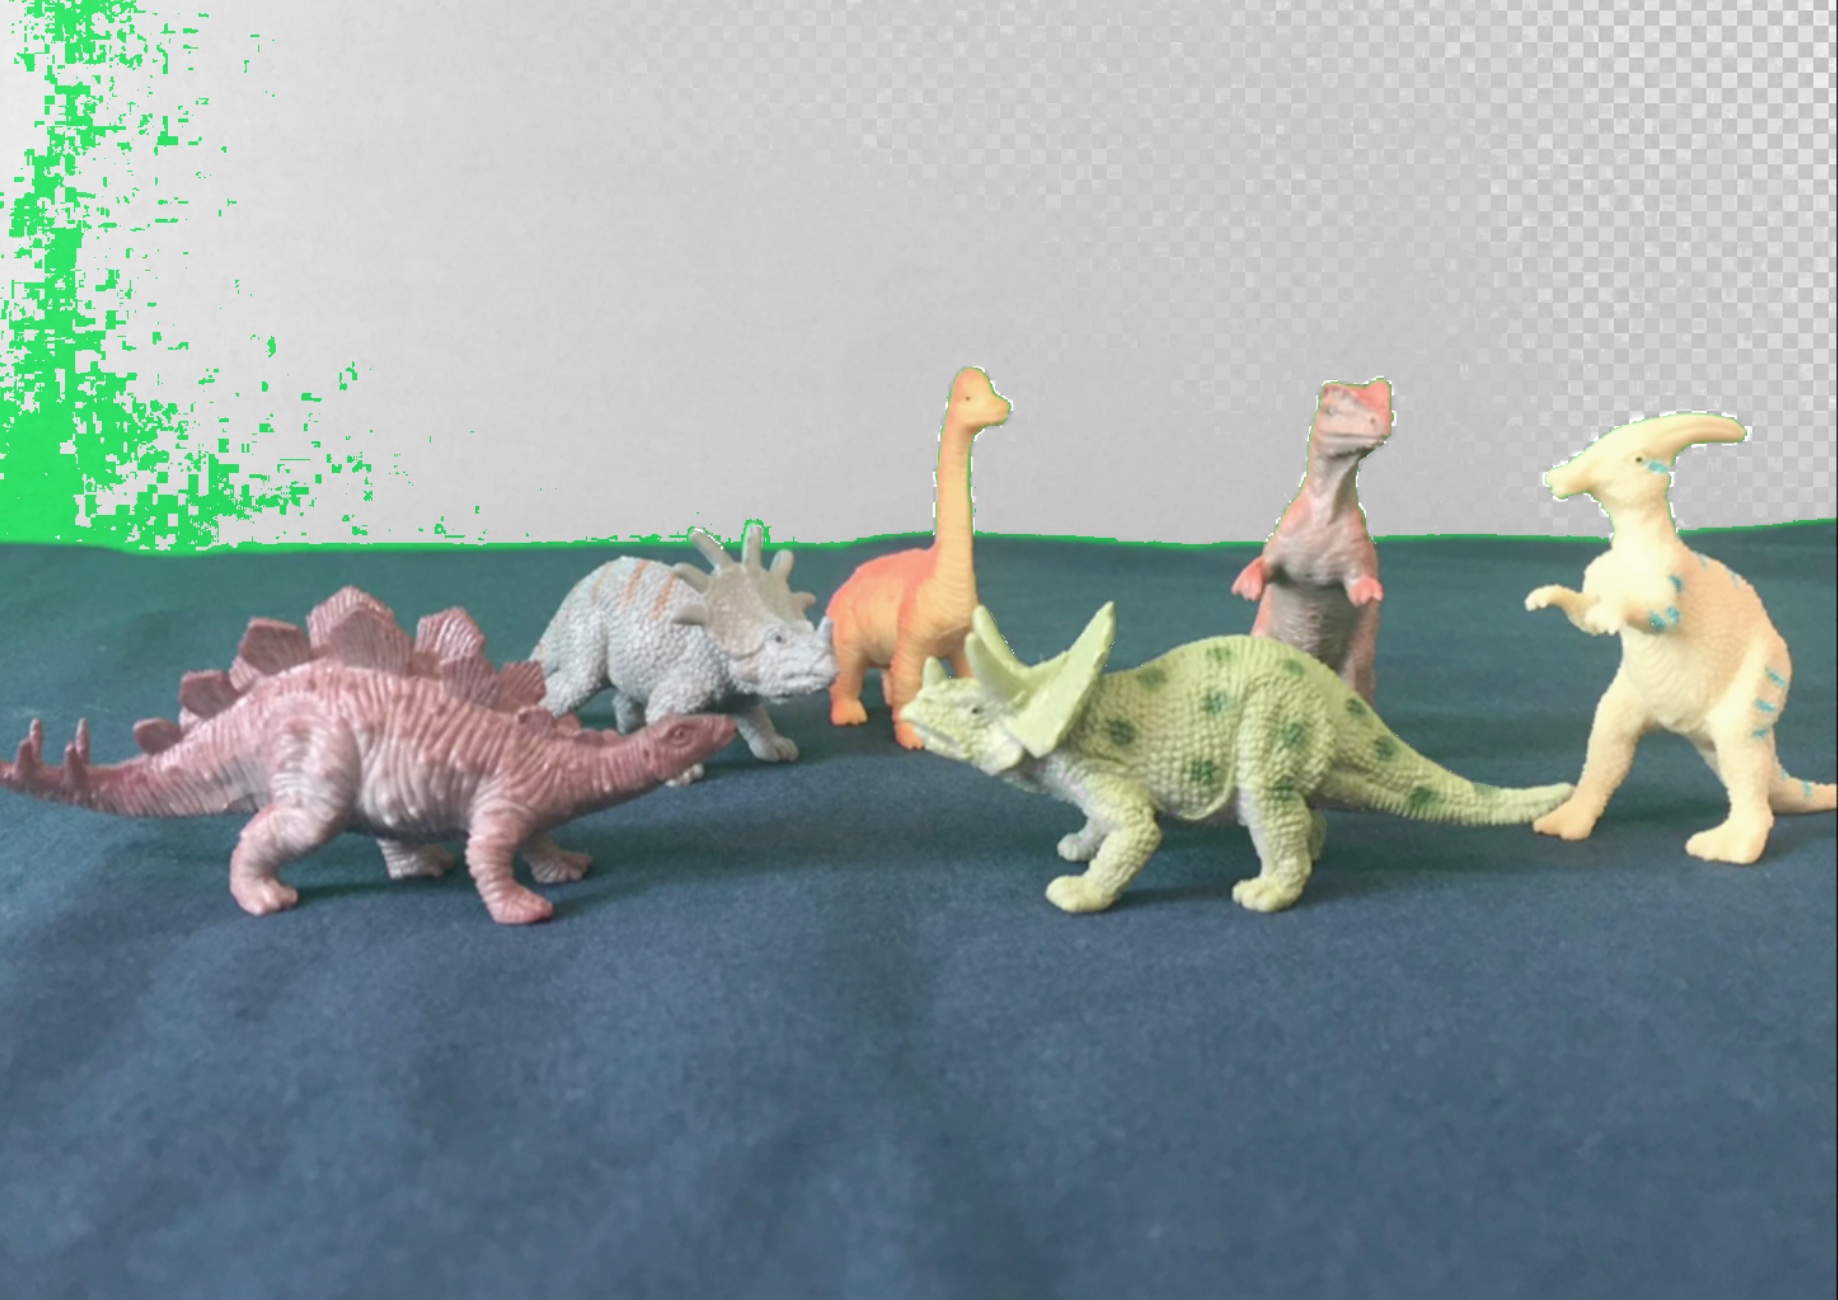
In this example, the tolerance is too low. Not enough green is eliminated and the background is still visible:

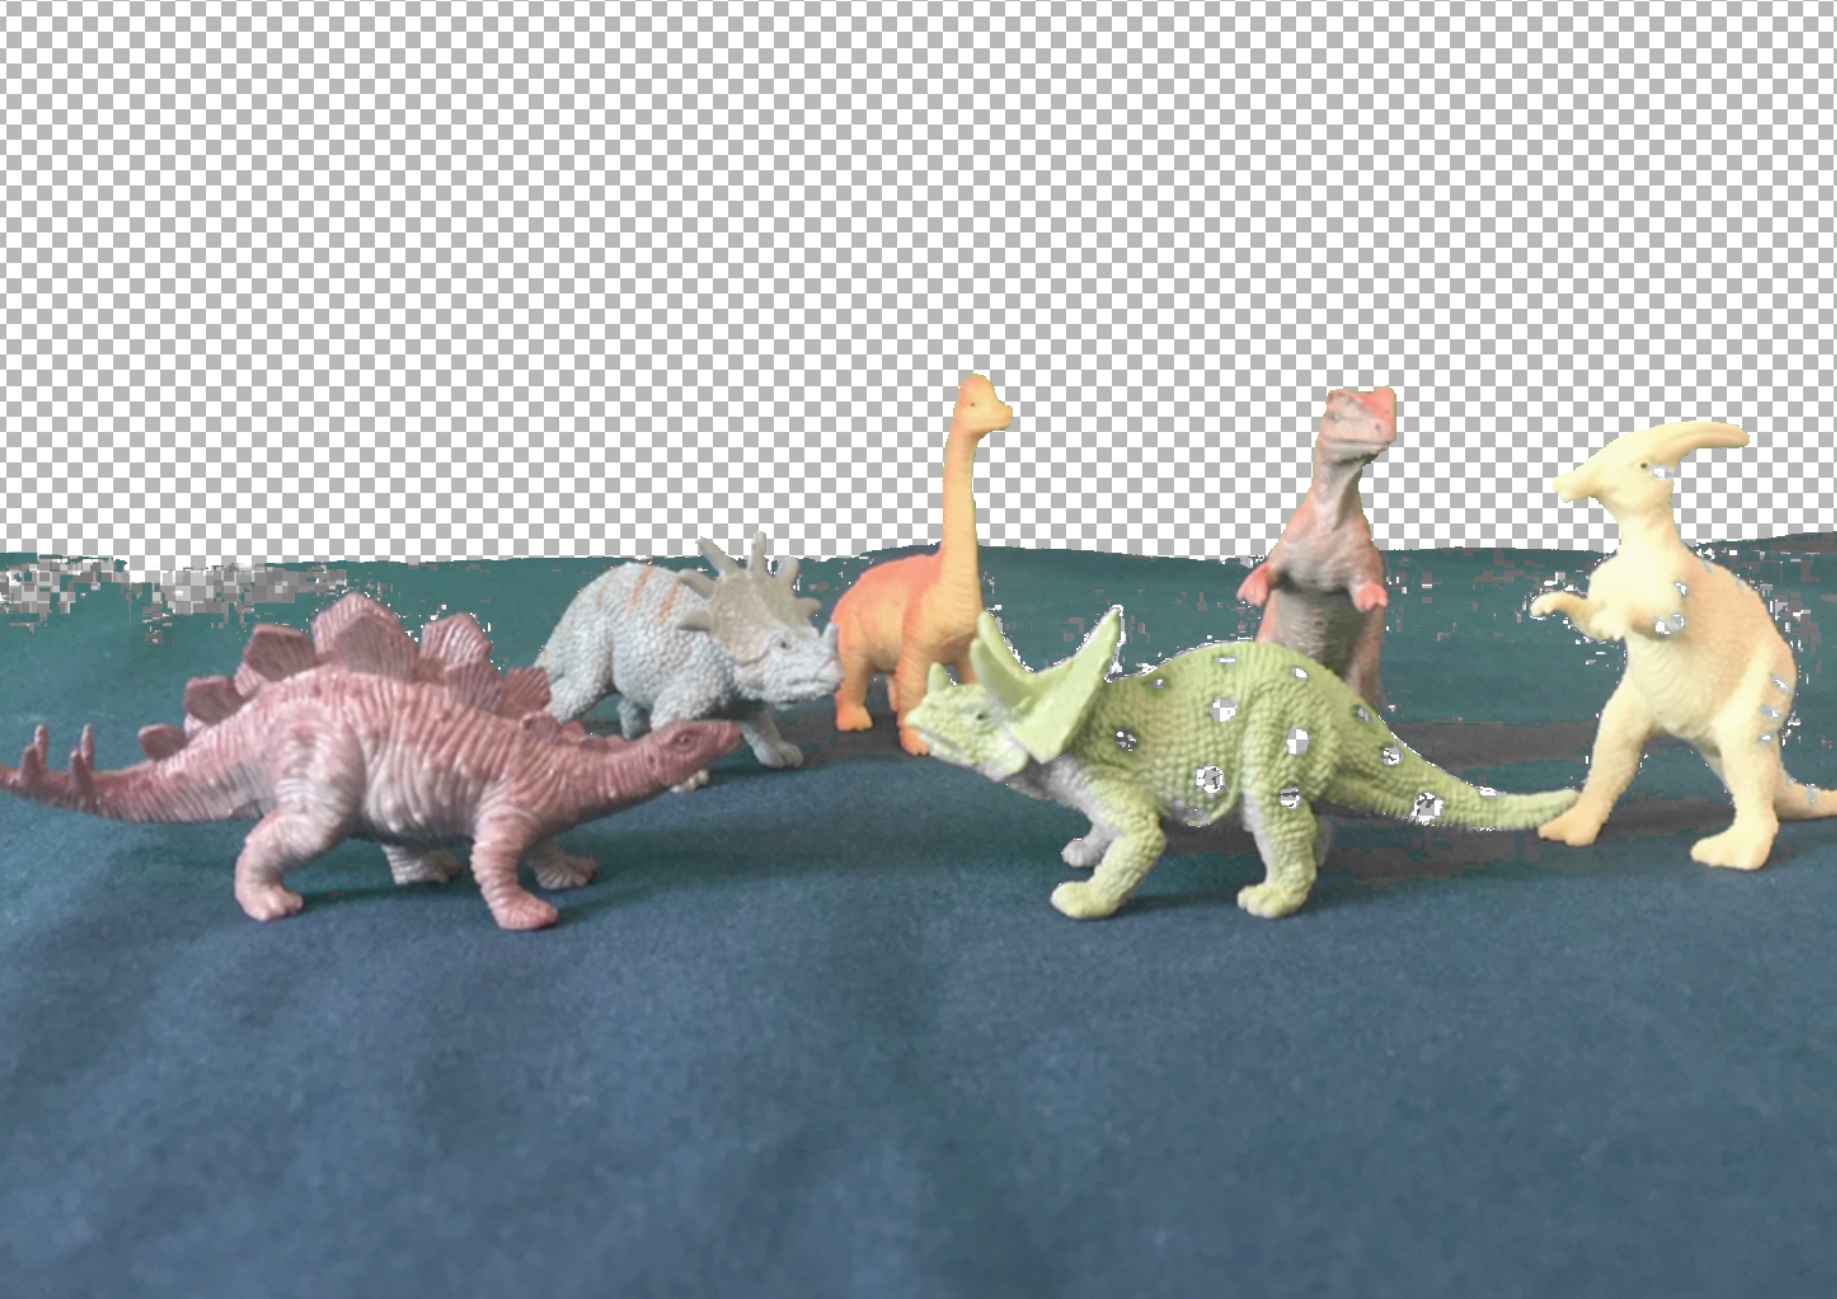
Here the tolerance is too high. Too much green is eliminated and parts of the green dinosaur in the front and of the surface will not be visible anymore:

Soften Edges
This control can be useful if you are not satisfied with the edges. Due to lens and sensor limitations, edges become blended with green and thus are not always sharp. Shiny elements that reflect the green backing, semi-transparent elements and wisps of hair also have a negative effect on your result. This value reduces unwanted transparencies around edges.
An automatic despill operation will reduce these unwanted "contaminations" and soften the contouring in those areas.
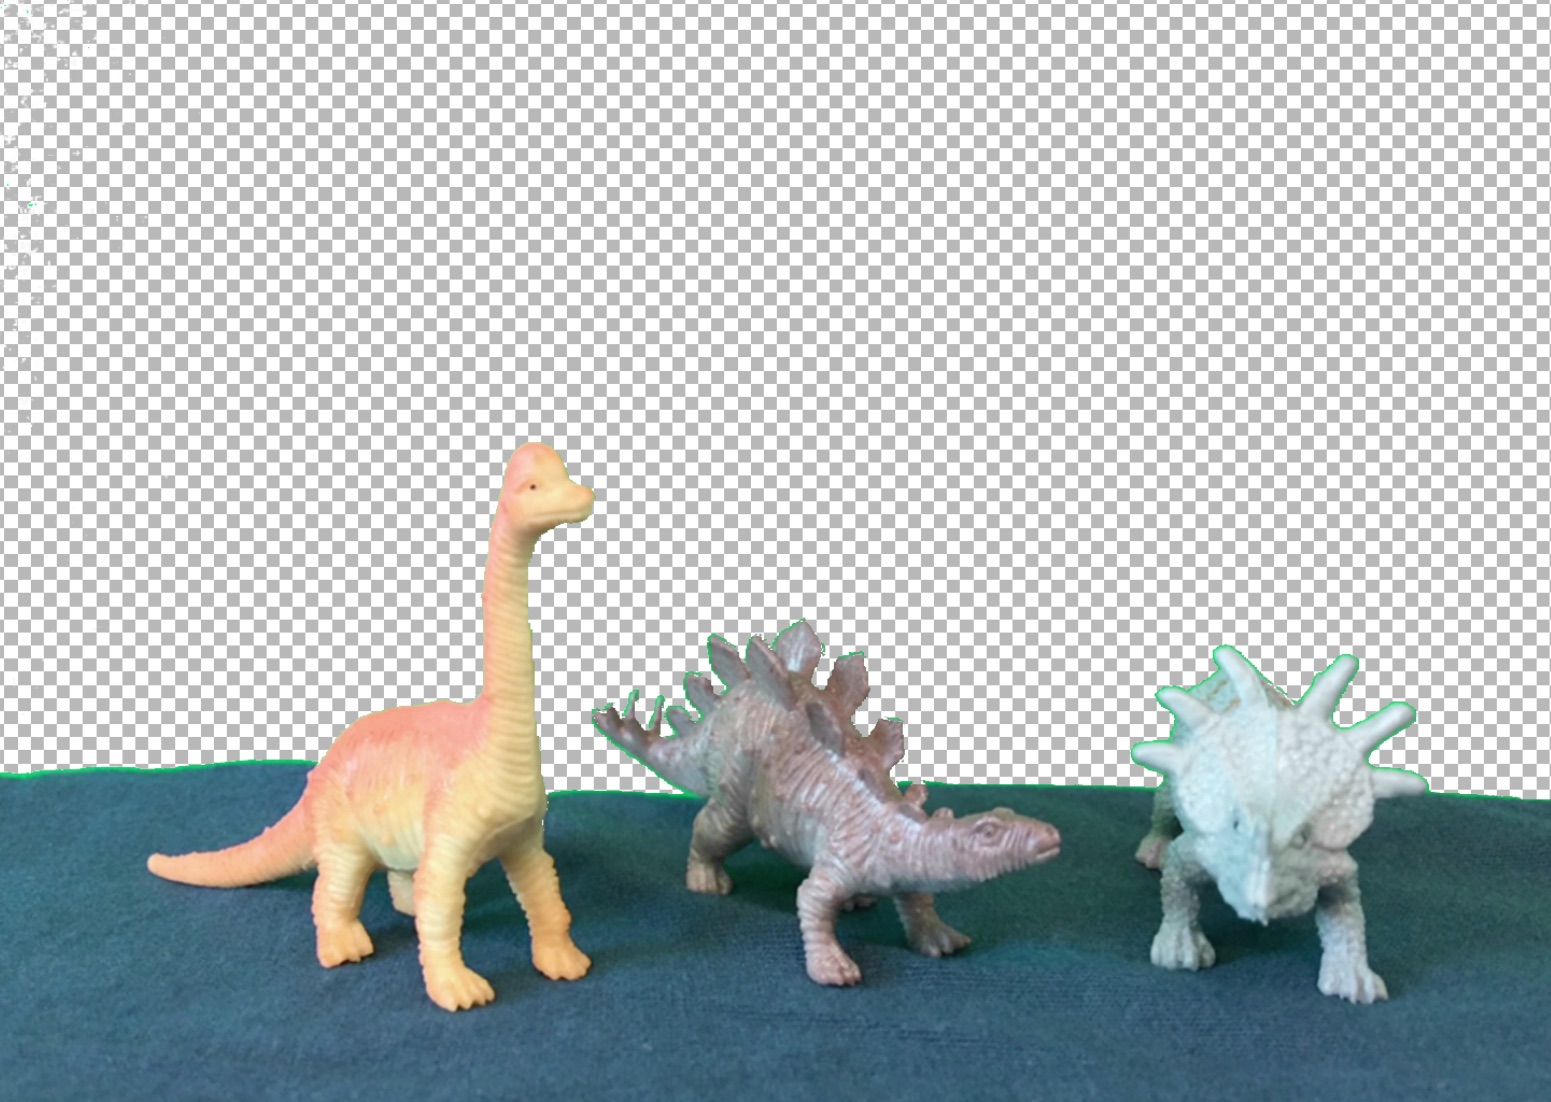
As you can see, the dinosaurs have green edges around their heads:

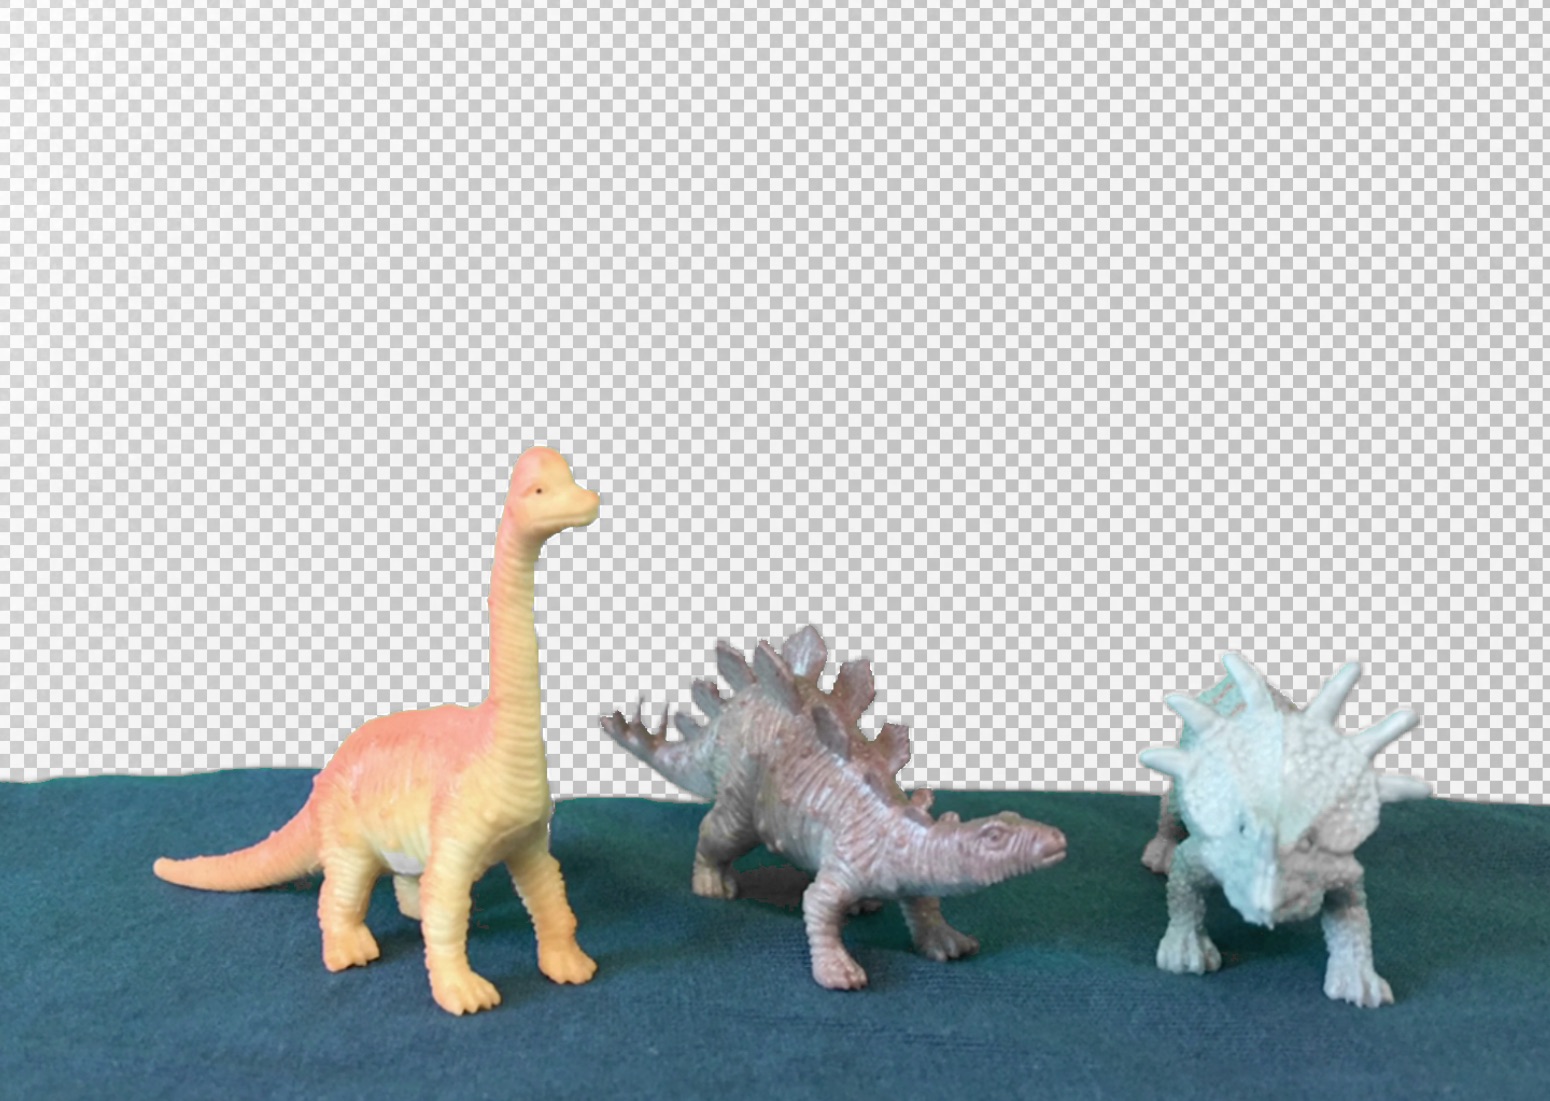
By increasing the control "Soften Edges", the contouring will be softened. Be careful not to set the value too high, or you will get grey spots.

Brightness and Saturation Threshold
With the upper slider you can adjust the threshold of the brightness to avoid "holes" in low light areas of your scene.
The lower slider controls the value of the key color saturation threshold. This helps with issues around very unsaturated areas that get keyed out.
Masking
You can mask your scene (i.e. hide whatever you do not need). This means that you do not need to eliminate all of the background and can focus on chroma keying the area around the primary subject (e.g. yourself).
Zoom
You can zoom into your scene while adjusting the controls (by pressing cmd+ to zoom in or cmd- to zoom out). This way it can be easier to adjust some settings.
Additional Tips
1. Try to not have shadows on the background. This means the background should have the same brightness everywhere and be evenly lit (background and subject should be lit separately).
2. Do not wear bright clothes because they will reflect the color of your Green Screen (Chroma Key) panel, thus leaving you with unsatisfying results.
To get the best results you should adjust the Chroma Key effect. Here are some instructions to help you out.
The following controls can be adjusted. You should always proceed in this order (from general settings to fine-tuning).
Hue
Select the main color that you want to be keyed. This color gets isolated and will be replaced by transparency. You can either use the "Pick Color" tool or the Hue slider to make adjustments.
Tolerance
To improve your result you need to adjust the color range sampled - this means how much the background color can differ from the selected key color.
Reducing the value narrows the range of color sampled, and vice versa, augmenting expands it.
This can be necessary as your background color will probably not be uniform (eg. because of imperfect lightening or camera sensor noise).
In this example, the tolerance is too low. Not enough green is eliminated and the background is still visible:
Here the tolerance is too high. Too much green is eliminated and parts of the green dinosaur in the front and of the surface will not be visible anymore:
Soften Edges
This control can be useful if you are not satisfied with the edges. Due to lens and sensor limitations, edges become blended with green and thus are not always sharp. Shiny elements that reflect the green backing, semi-transparent elements and wisps of hair also have a negative effect on your result. This value reduces unwanted transparencies around edges.
An automatic despill operation will reduce these unwanted "contaminations" and soften the contouring in those areas.
As you can see, the dinosaurs have green edges around their heads:
By increasing the control "Soften Edges", the contouring will be softened. Be careful not to set the value too high, or you will get grey spots.
Brightness and Saturation Threshold
With the upper slider you can adjust the threshold of the brightness to avoid "holes" in low light areas of your scene.
The lower slider controls the value of the key color saturation threshold. This helps with issues around very unsaturated areas that get keyed out.
Masking
You can mask your scene (i.e. hide whatever you do not need). This means that you do not need to eliminate all of the background and can focus on chroma keying the area around the primary subject (e.g. yourself).
Zoom
You can zoom into your scene while adjusting the controls (by pressing cmd+ to zoom in or cmd- to zoom out). This way it can be easier to adjust some settings.
Additional Tips
1. Try to not have shadows on the background. This means the background should have the same brightness everywhere and be evenly lit (background and subject should be lit separately).
2. Do not wear bright clothes because they will reflect the color of your Green Screen (Chroma Key) panel, thus leaving you with unsatisfying results.