This guide will walk through a first-time setup of Voicemod on Windows 10 using Wave Link.
Installing Wave Link
1) Download Wave Link from https://e.lga.to/download
Disconnect Wave:1 or Wave:3 if it is currently connected to the PC
2) Once the download is finished, install Wave Link.
3) After the Wave Link installation is finished, connect your Wave:1 or Wave:3 microphone to the PC
Installing Voicemod
1) Download Voicemod from https://www.voicemod.net/
2) Once the download is finished, install Voicemod
3) After the Voicemod installation is finished, open the application.
Voicemod Initial Mic Setup
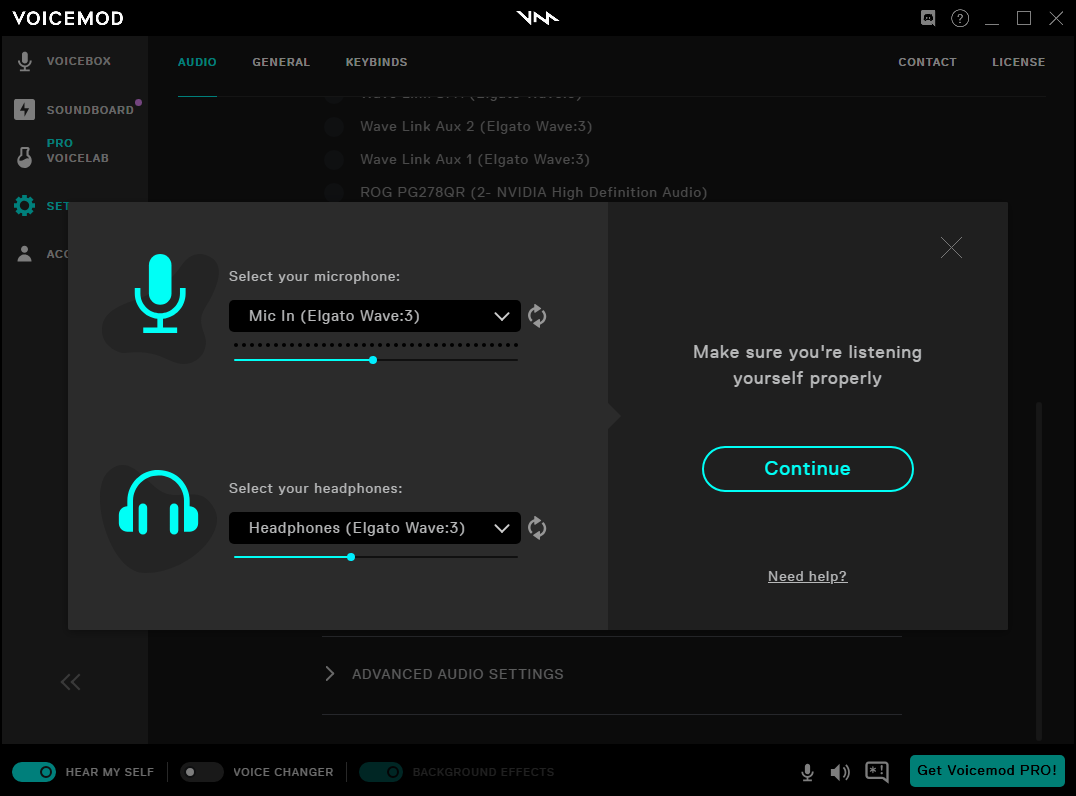
1) Once Voicemod is open, an initial setup screen will appear. Select your Wave Microphone and default headphones.

2) Once the mic & headphones have been selected, select the "Continue" button. Note* Voicemod must detect a voice before the "Continue" button will appear.
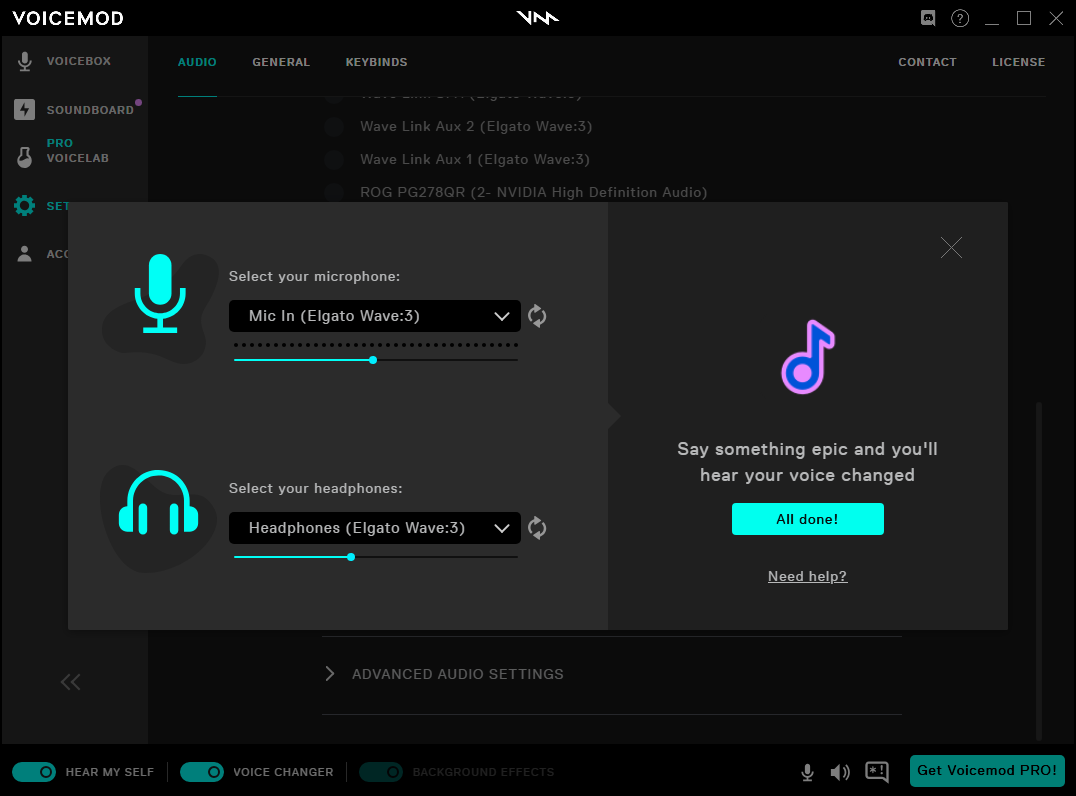
3) After clicking 'Continue', say a few words to ensure Voicemod is working. Once verified, hit 'All done!'

Note - To disable Voicemod voice monitoring, uncheck "HEAR MY SELF" near the bottom-right.
Adding Voicemod to Wave Link
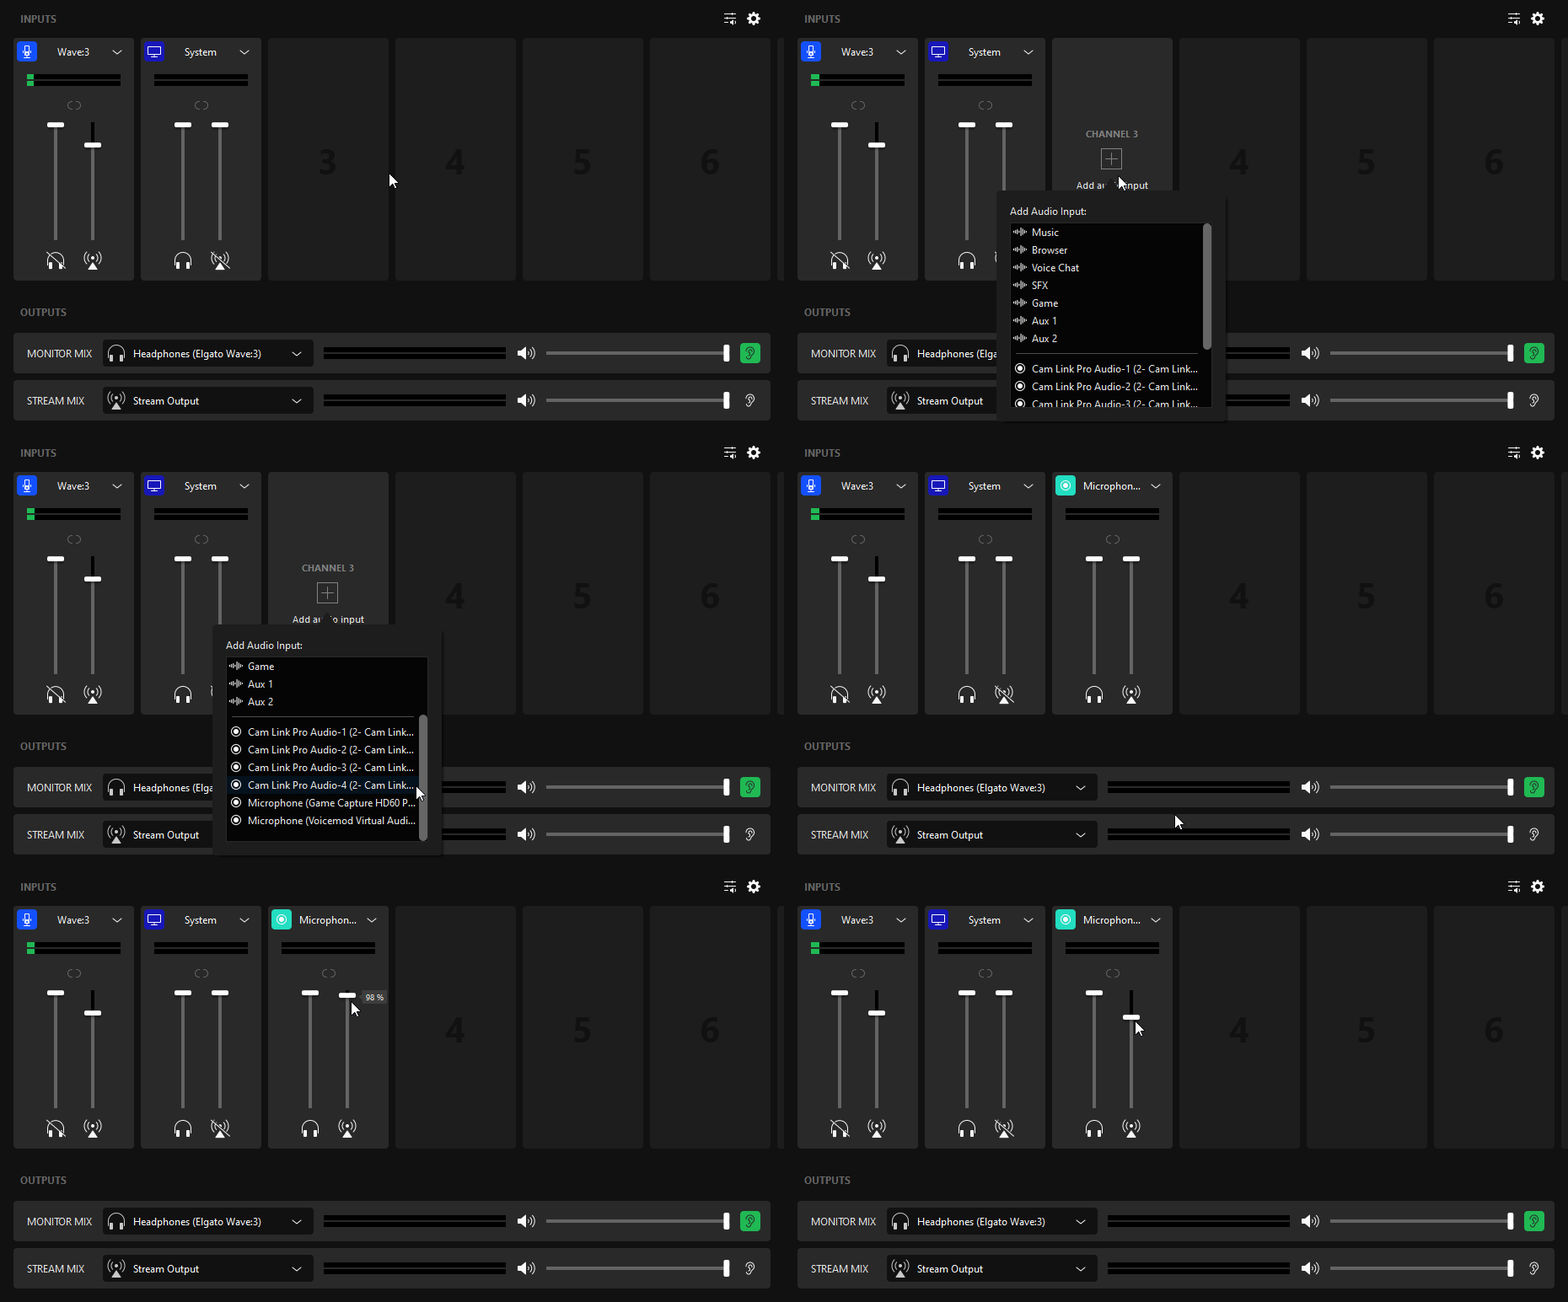
1) Once Voicemod is set up, open Wave Link
2) Select a blank audio channel and add a new input. Once the list appears, select "Microphone (Voicemod Virtual Audio Device (WDM))"

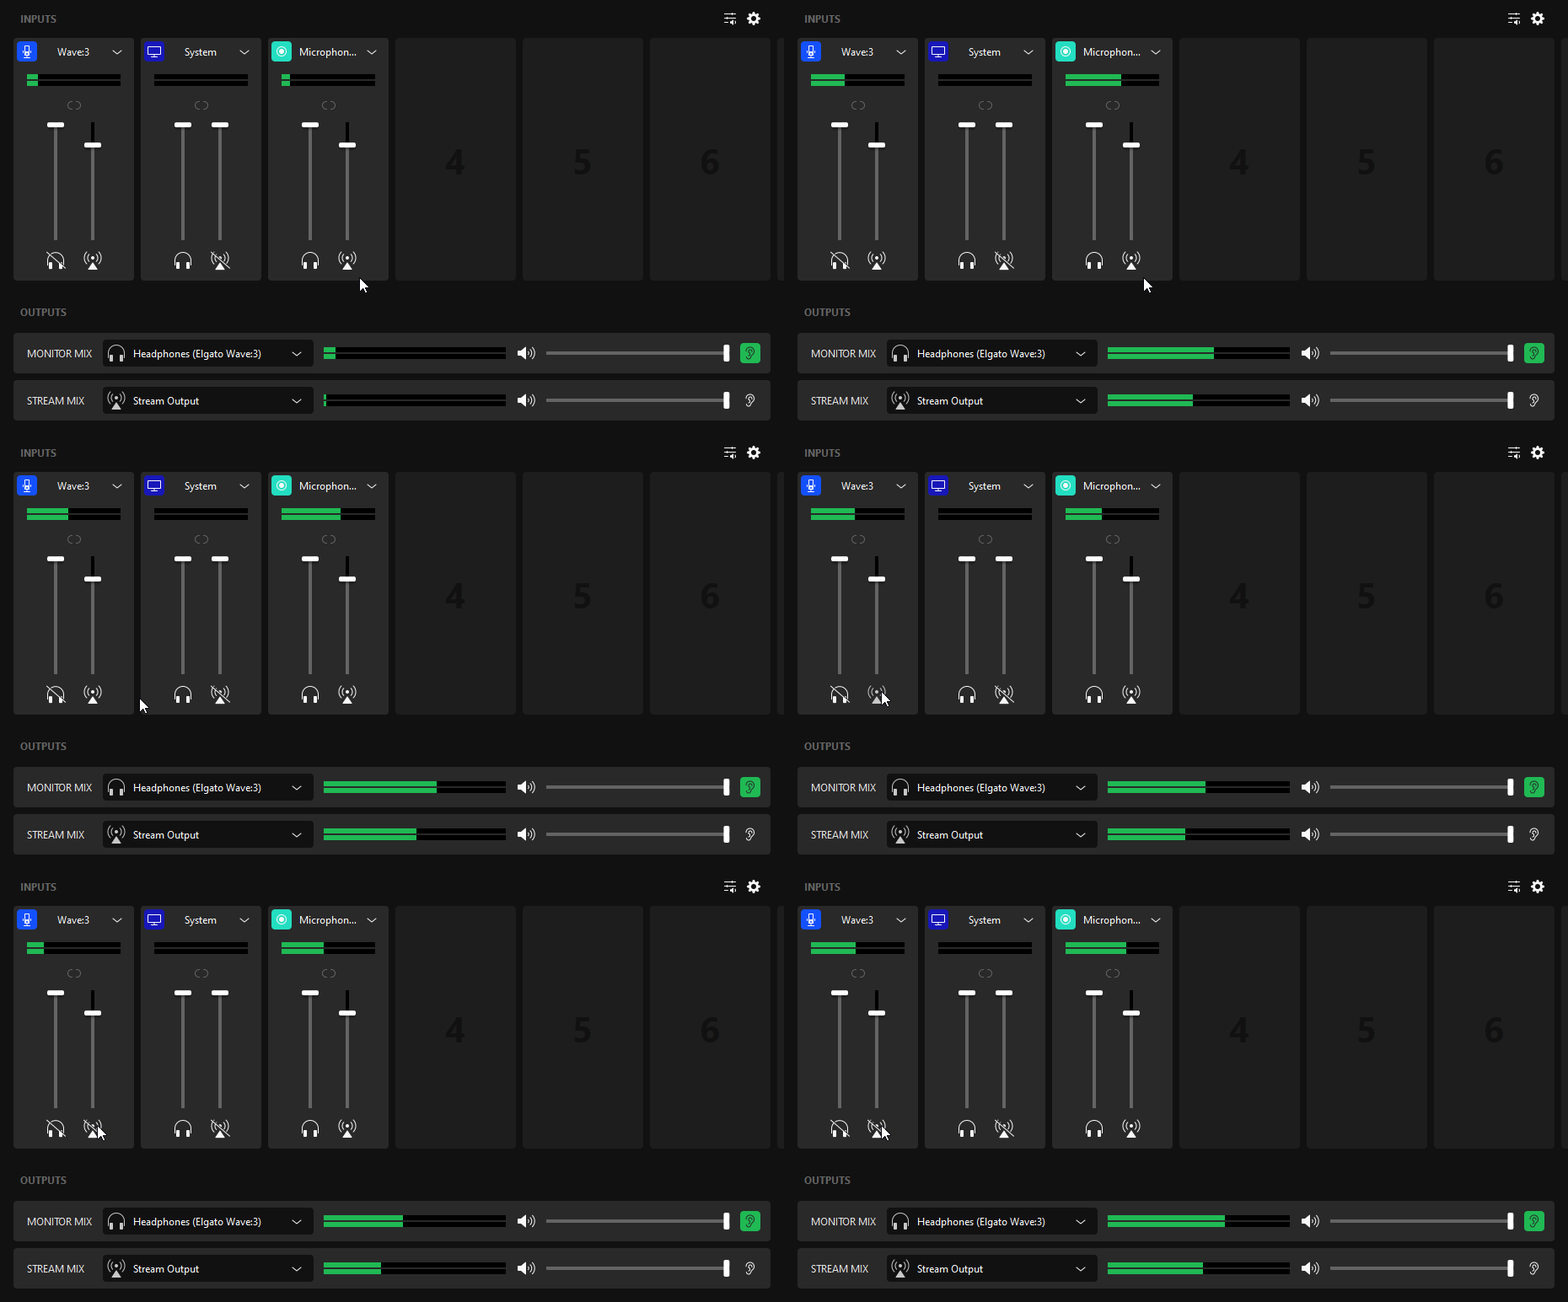
3) With Wave Link Stream Mix, be sure to mute the mic. This will prevent your voice from echoing alongside the Voicemod effect.

Voicemod is now added to Wave Link. IIf you unmute/mute the Mic's Stream Mix frequently and own a Stream Deck we suggest adding Wave Link's Mute Input.