This guide will cover how to use VST Audio Effects in Wave Link.
- Requirements
- Registering VST2 Plugins (Windows)
- Registering VST3 Plugins (Windows)
- Registering AU Plugins (macOS)
- Adding Audio Effects To A Channel
- Managing Audio Effects
- Audio Effect Processing Latency
- Delete Audio Effects
Watch Set Up Video
System Requirements
These are the requirements for using VSTs in Wave Link:
A device that enables Wave Link
-
- Wave:1
- Wave:3
- Wave XLR
- Stream Deck +
- Corsair Voyager Laptop
Windows
Wave Link 1.4 or newer
- VST Plugins
- VST2 (.dll) plugins are support
- VST3 (.vst3) plugins are supported
- Wave Link does not include pre-installed VST plugins. See VSTs that Elgato recommends.
macOS
Wave Link 1.4.1 or newer
- AU Plugins
- Audio Unit (AU) plugins with the file type .component are supported.
- macOS comes with some audio effects pre-installed.
Scanning VST2 Plugins
Before VST2 plugins can be used in Wave Link they need to be scanned and registered.
VST2 Plugins (.dll files) need to be located in the same folder.
To select the VST2 Audio Plugin Folder, please follow the steps below:
1 ) Open Wave Link and click Preference 
2 ) A new window will appear. click on Choose VST2 Folder.

3 ) A new explorer window will appear, select the VST2 folder you like to use.
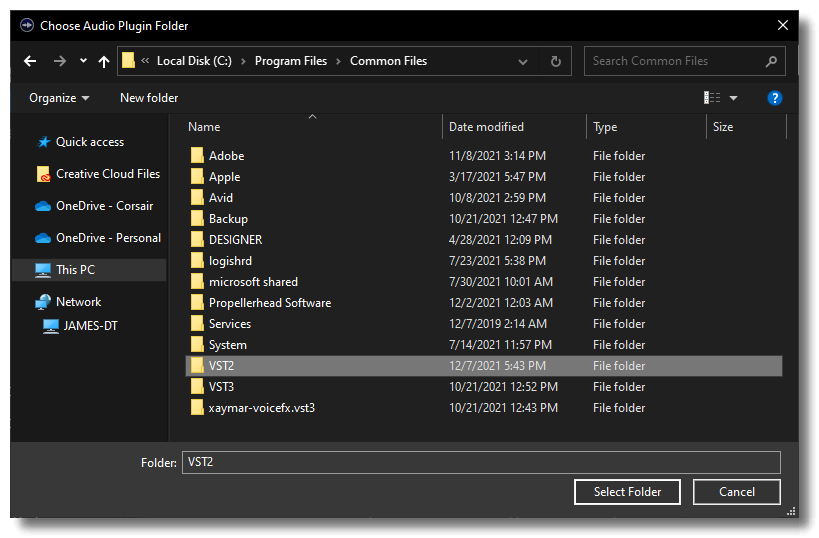
4 ) Once the scan is complete, a message will appear indicating how many new plugins were found.
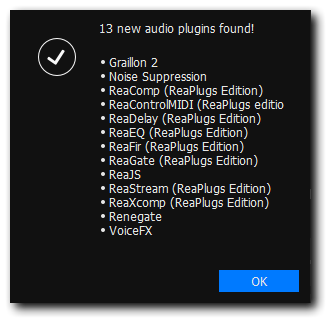
If the VST2 effect is not found, please ensure the format is a VST2 (.dll) and located in the correct plugin folder.
Scanning VST3 Plugins
Before VST3 plugins can be used in Wave Link they need to be scanned and registered.
VST3 plugins (.vst3) automatically install to C:\Program Files\Common Files\VST3. The VST3 Plugin folder cannot be changed as per VST guidelines.
Once the desired VSTs are installed, follow the steps below:
1 ) Open Wave Link and click Preference 
2 ) A new window will appear. click on Rescan Folders.
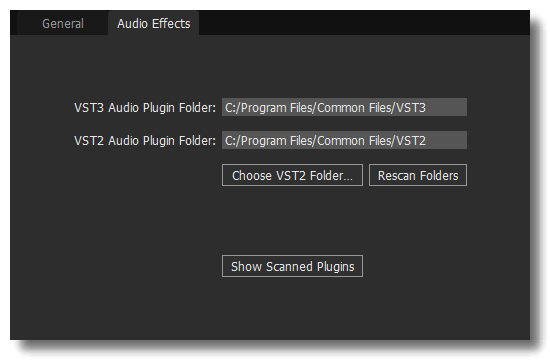
3 ) Once the scan is complete, a message will appear indicating how many new plugins were found.

If the Audio Effect is not found, please ensure the format is a VST3 and in the correct plugin folder.
Scanning AU Plugins
Audio Unit (AU) plugins on macOS are scanned automatically when Wave Link is launched.
The scan location is
- /Library/Audio/Plug-Ins/Components
When a new audio effect is installed, quit and start Wave Link to automatically register the effect.
No additional steps are required to start using Audio Effects on macOS.
Adding Audio Effects To A Channel
1 ) Click Audio Effects 
2 ) Click the  icon.
icon.
3 ) Select the effect from the list.
4 ) The Audio Effect Icon will turn green  indicating a audio effect is active and ready to be used.
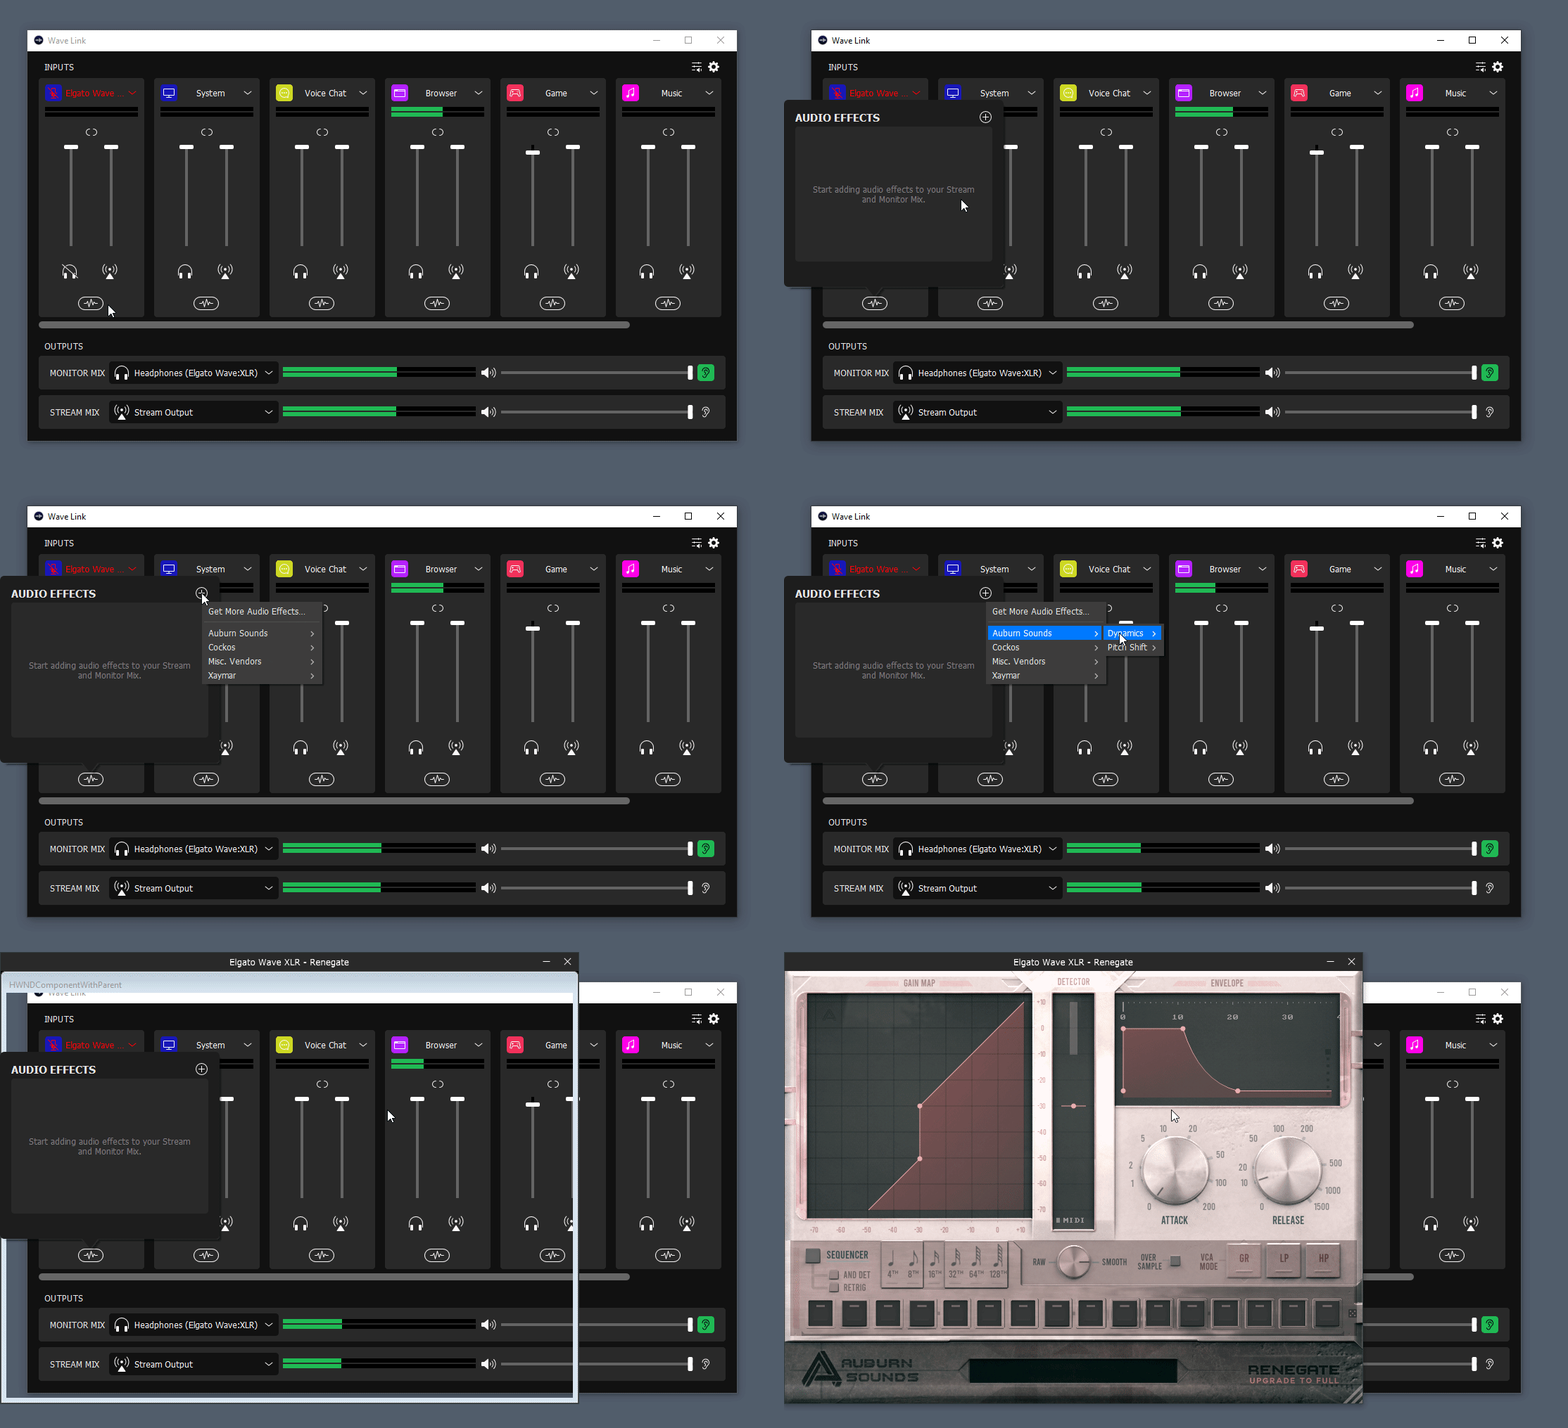
Once the audio effect is active, it'll apply to the Stream, Monitor, and MicrophoneFX mixes.
More information about how to use Wave Link MicrophoneFX mix.
Managing Audio Effects
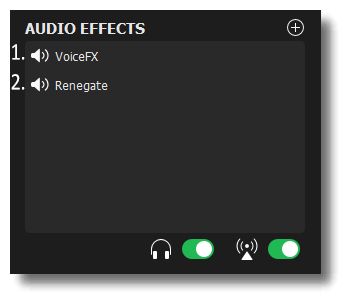
1 ) Each Wave Link input channel is limited to 10 audio effects.
2 ) Effects can be previewed by toggling the Monitor or Stream Mix icon in Audio Effects 
3 ) Effects start processing from the top of the Audio Effects list.
4 ) Effects can be rearranged by clicking and dragging each effect.
Audio Effect Processing Latency
Adding audio effects to Wave Link input channels will introduce additional audio latency that comes from the audio processing.
The latency introduced by an effect depends on the processing - Simpler effects like a noise gate may introduce 10 milliseconds (ms) additional latency which is imperceptible, while more complex noise suppression or vocal effect effects add noticeable 50 or 100-millisecond processing latency.
Each effect added to a channel will add to the overall latency.
If the audio latency is too high, consider reducing the number of effects used or using an effect that have processing latency.
Delete Audio Effects
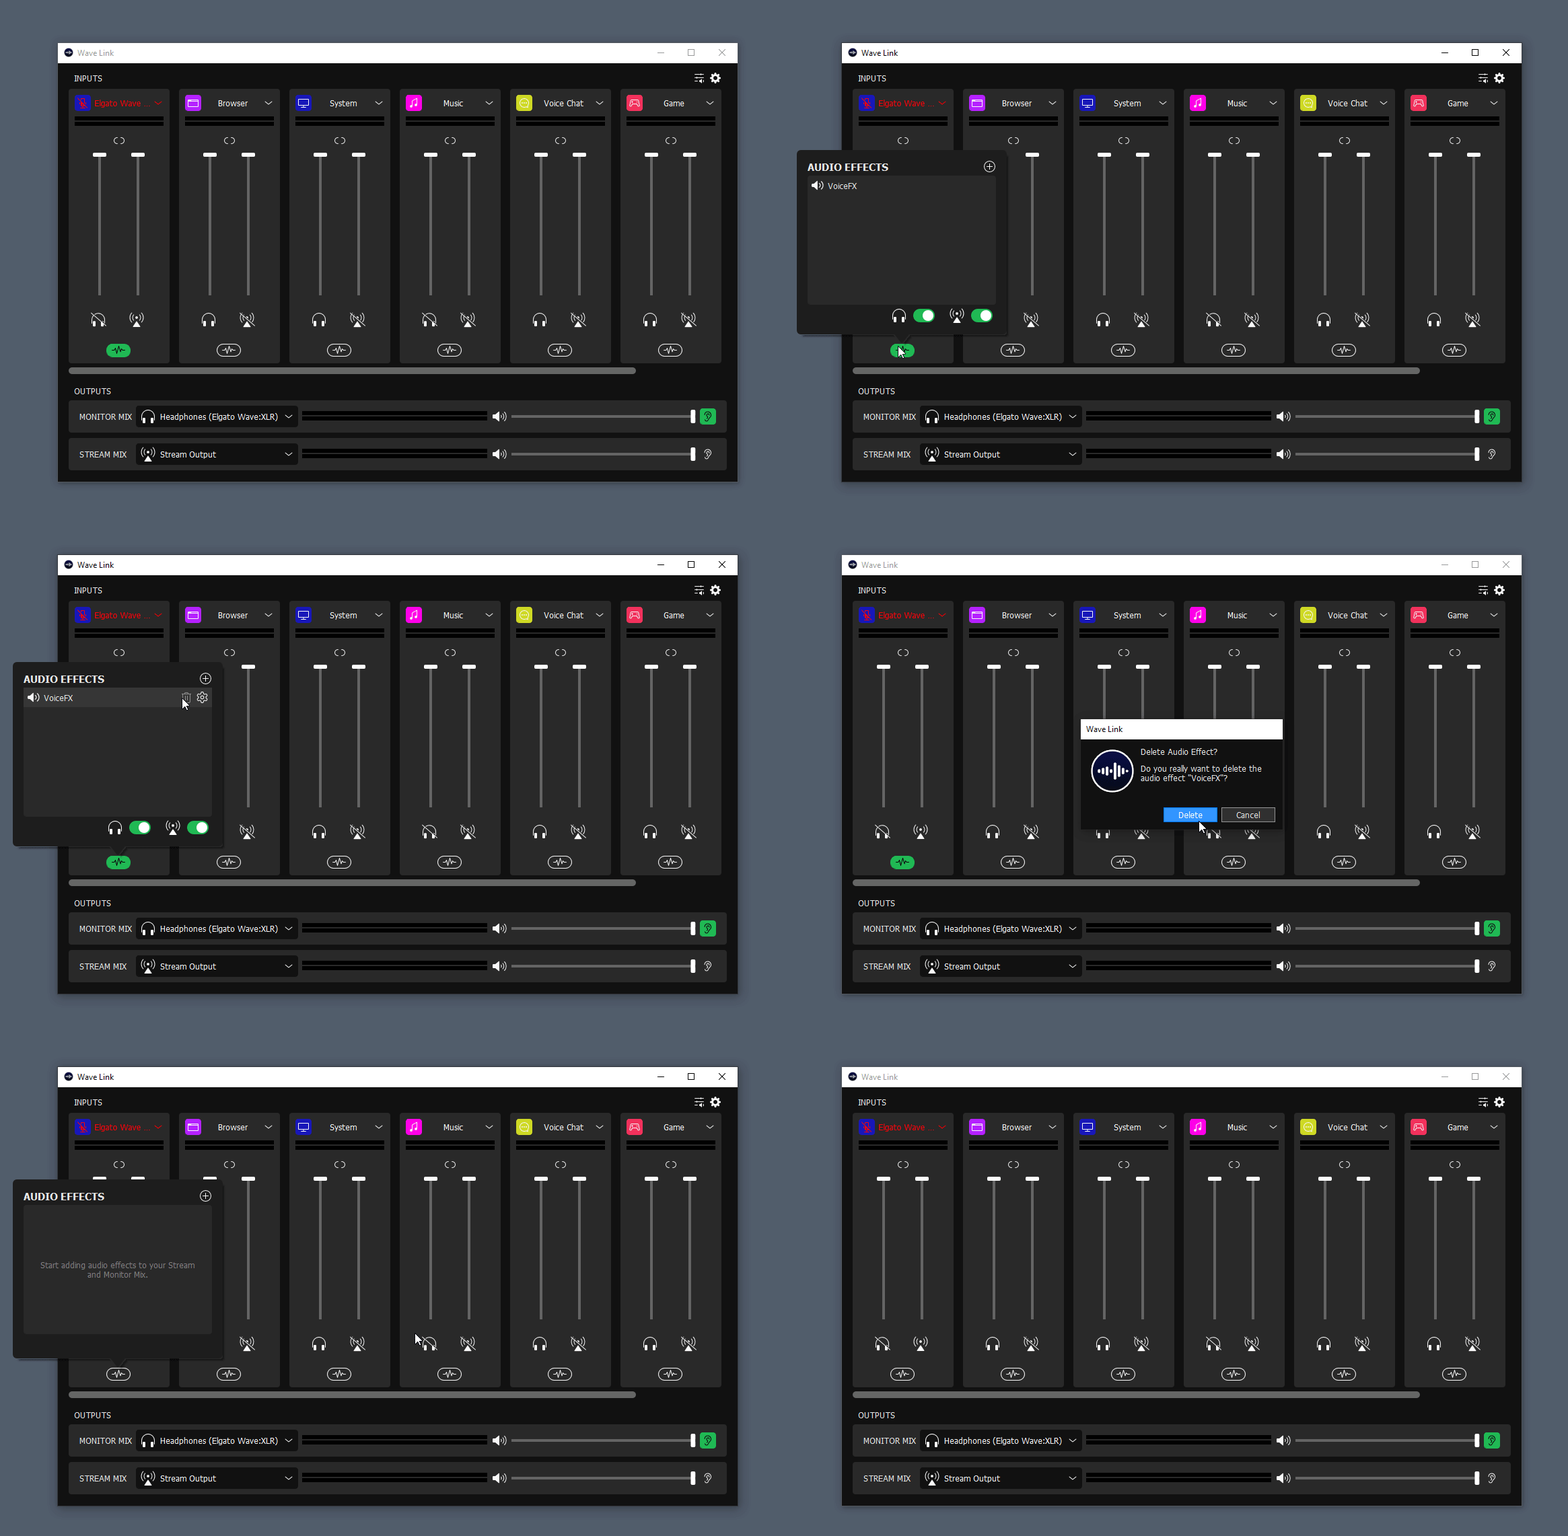
1 ) Click Audio Effects 
2 ) Highlight the effect from the list and click the Trash icon.
3) A new window will appear to confirm if you would like to delete the audio effect.
Help and Support
For additional help and support, please visit: https://e.lga.to/help